Building the coop was one of our more difficult challenges. Especially seeing as how neither of us had ever built anything before. we definitely learned that its not as easy as we thought. Either that or we just did everything the hard way. We took a little time and drew out a design.
 | 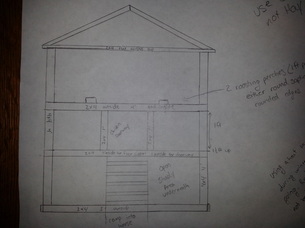 |
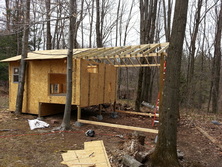
Looks simple enough, right? It probably would've been, if we had stuck to that lol. But nope, we decided it would be awesome to have a shed attached to the back end with the nest boxes in it and a roof covering the entire thing, run and all! It cant be THAT hard and we have PLENTY of time. After all, we had 8 weeks right? So we picked the perfect spot out in the yard. Out of the way but not far from the back door.
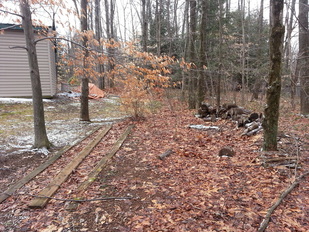 | 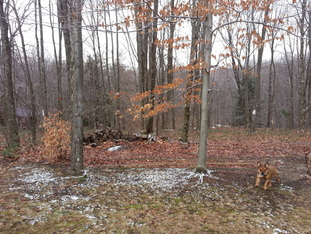 |
The only thing standing in our way were a couple of old boards in the ground and a bush..... but, this was the middle of February....
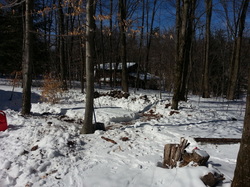
Wrong! We were so excited (mostly me, I'll admit) to get chicks that we had to get them the very first day that Tractor supply had them in. We didn't really give much thought to building the coop out in the snow. I guess, the original design could've been built in the garage and moved out but nope. It was really cold so of course the snow was hard as a rock and took forever to dig out. it took a couple hours just to dig out our rough squares where the coop would be. Rob and I took turns, one of us shoveling, the other breaking the snow into chunks to be shoveled.
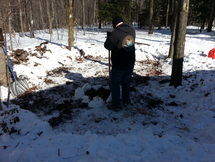
If we thought that was a pain, we decided that we were going to put this entire coop up on concrete footers.....which required digging holes in the solid ground to level them out. That was next to impossible! We resorted to using gasoline and burning spots to help thaw the ground. It helped a little but still took FOREVER! We also had to dig out the roots from that bush. Even with using the gasoline and burning through them, we still couldn't get them all. in the end, we just got out what we needed to so it wouldn't be in the way.
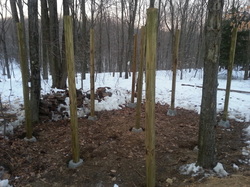
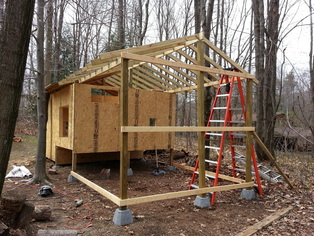
Keep in mind, we were guessing how to do all this lol. I know, if we did it again, we'd do it different and probably simpler lol. By this point it had been about a week or so. The spot was cleared out, the holes were dug and the posts were in...sort of. The footers were all level and even but the posts didnt exactly go in straight. I guess we were just banking on the walls pulling everything straight and even. Thank God that worked! But before walls, we needed to do floors. Those, we did do in the garage. we wanted this whole structure to be completely insulated and built to last so we built the entire floor platform in
the garage and carried it out. I should've known how heavy that would be but didn't even give it a thought. We framed it out, screwed the plywood to one side, flipped it, insulated it, and put subflooring on the other and somehow managed to carry it out. We felt really good about getting it out, on and leveled. We could even walk on it and it didnt break! YES! From there, we were on a roll for a little bit.
This is about the point where disaster struck for us and the dogs managed to break into our brooder and kill all of our chicks. We were all heartbroken. All work on the coop basically stopped in its tracks. There was no desire to go out in the cold and work on it and we just couldn't even think of getting anymore. But after about a week, we were back at tractor supply getting more. We missed the sound of little peeps and we knew that we needed to get moving again if we wanted to get eggs by summer time.
 Rob hard at work | 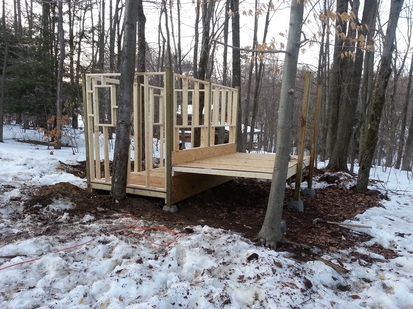 |
I was thrilled when I climbed up on that platform that would be our coop's floor and it didn't collapse! It was even better When the whole family was up there and it held strong. HUGE sigh of relief.
Around this time, our son was starting baseball again and our daughter was still in dance yet so our time to work on our project was cut back. We worked on it when we could but it was taking a lot longer to get done than we had anticipated. I was terrified that our flock would outgrow their brooder in the garage before we had it done for them.
Around this time, our son was starting baseball again and our daughter was still in dance yet so our time to work on our project was cut back. We worked on it when we could but it was taking a lot longer to get done than we had anticipated. I was terrified that our flock would outgrow their brooder in the garage before we had it done for them.
| Spring rains weren't helping us to get done either. It always seemed to want to rain when we had some spare time to work. I, being a stay at home mom, worked on what I could, when I could. I got pretty good with a circular saw and cutting plywood :) Slowly but surely, our coop was coming together. With all the rain, everything was getting really wet so we decided it was time to start the next big adventure....get the roof on. | |
 | Neither one of us knew much of anything about roofing so we just took it like we take everything else: One step at a time, one question at a time, one board at a time. We have a motto here. It's "Sink or Swim". We figure it out or fail. So far, we haven't sunk yet (knock on wood!) |
 | 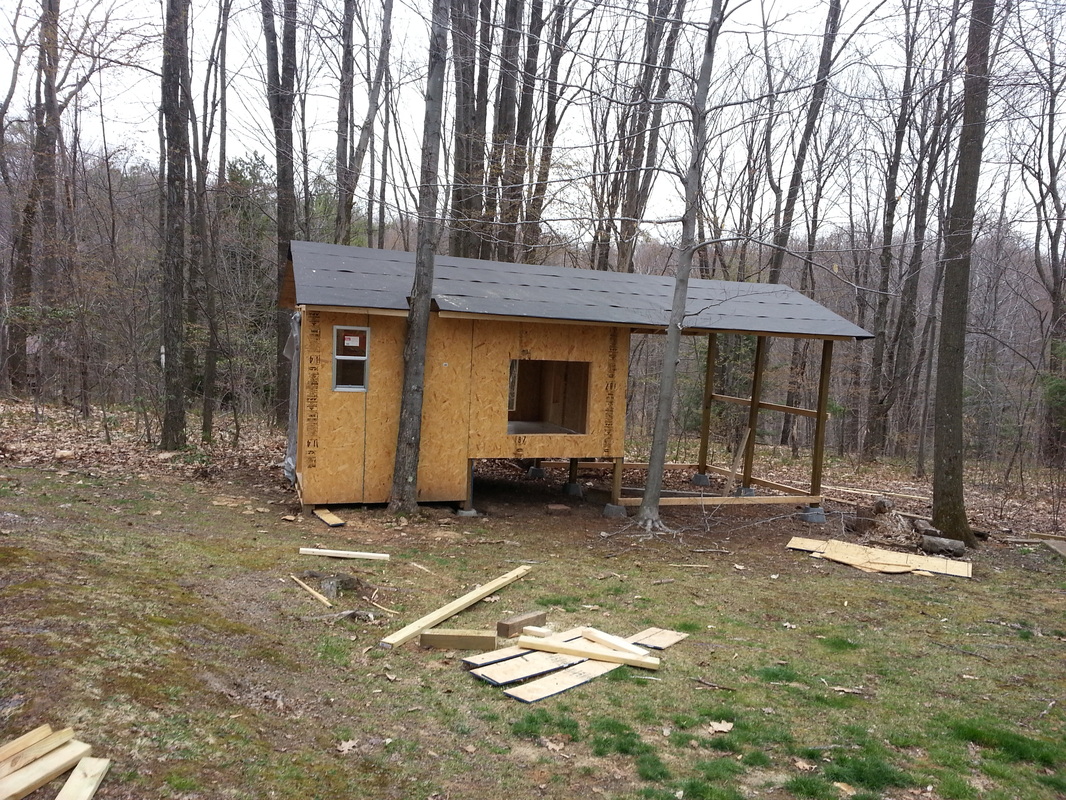 |
With the roof finally in place, we really needed to get the inside of the coop together. Our little flock was growing FAST and were quickly outgrowing their brooder. They were about 10 weeks old at this point. Every day, I would go out and open the lid to the brooder so they could "free range" on top of it during the day. At least get out and stretch a little and not be all crammed together in one spot.
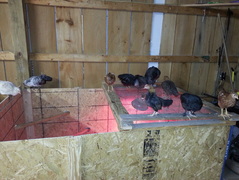
We knew we couldn't get everything done perfect but we did the best we could. We put linoleum down on the floor, the roosts with poop boards underneath went in and also were covered in linoleum for easy cleaning. We blocked the holes for the nest boxes with hardware cloth and built the big access door on the side. The opposite side, we just covered in plywood for the time being. I'm very thankful that we did that though. Now, it'll be easy to add an addition to the coop on that side :)
We knew we couldn't get everything done perfect but we did the best we could. We put linoleum down on the floor, the roosts with poop boards underneath went in and also were covered in linoleum for easy cleaning. We blocked the holes for the nest boxes with hardware cloth and built the big access door on the side. The opposite side, we just covered in plywood for the time being. I'm very thankful that we did that though. Now, it'll be easy to add an addition to the coop on that side :)
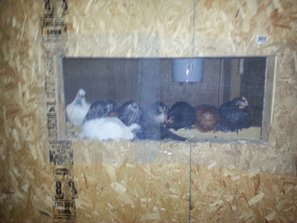
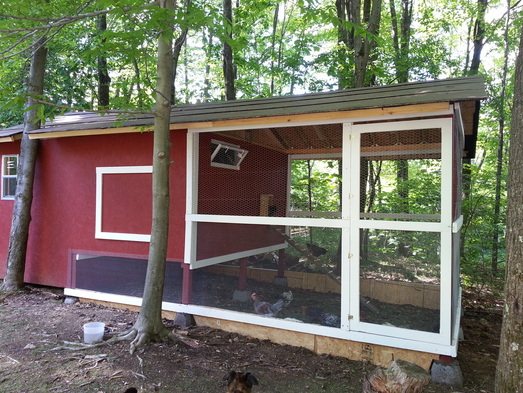
We got eveyone moved in safe at about 12 weeks old. That was a few weeks later than I wanted to get them in there but at least they were out of the brooder. It took them a while to figure out the roosts and for the first couple weeks, they slept on the ledge to the nest box that was covered in hardware cloth. I cant blame them though. I'm sure the air felt great there in the evenings. They definitely loved the extra space but we needed to get moving on the run so they could get outside too. The run wasn't too hard to put together but everything was so time consuming. Paint. Dry. Repaint. Dry. Paint again. Dry. Sigh. But then there came the hardware cloth and chicken wire. That stuff is a PAIN to work with! I was so happy when we put in that last staple! Here are some pictures of the final result.
Now, I will admit, it's not completely done. The shed side still needs finished, some more trim needs put up, and the roof still needs shingled but hey, it looks good for now! Just goes to show what you can accomplish when you have no clue what you're doing!
 RSS Feed
